When I was in Jr. High School, about 1957, I had a couple of drafting courses. I really got into it, and for an extra project I decided to draw all the parts of a 4 cylinder enginge from a magazine I had. I think it was a Popular Science or Popular Mechanics. I drew the entire engine, and in the process learned a great deal about engines.
If anyone knows what magazine ran a 4 cylinder engine about 1956 or 7 I would
really like a copy. Ive long since lost all those drawings,and now would really
like to build that engine
After the entire series was printed, I read it over a few times and decided to build it, but with a couple modifications.
I made my own patterns and had them cast in aluminum by a friend. The crancase halves and gear cover were exactly like the article. For the cylinder block I made a shape like marine engines of about mid-1920's. I made a core box to make the block hollow for water passage, and pressed in cast iron sleves for cylinders.
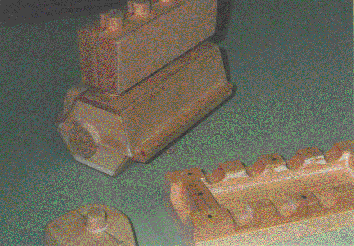
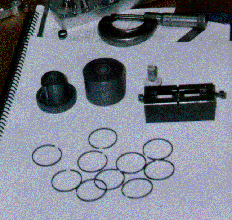
Here is a photo of the patterns and core box. Note the block is just a simple
rectangle. I later made a new block, with a better shape, but never took a photo
of the pattern.
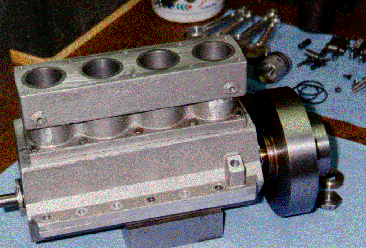
Heres a photo of the crankcase and block assembled. Note the new block shape.
I made my first attempt from drill rod, and tried to harden it. It warped badly, and a slight attempt to straighten it broke like glass. I then got a rod of 4140 steel and turned it from that. Should be hard enough for reasonable use.
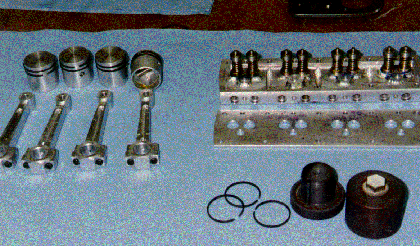
I made the pistons, rods, etc according to the article. I made the rings following the
process described in SIC Starting in Vol 2 No 7. The photo shows the heat treating jig, the cleaver jig and some finished rings.
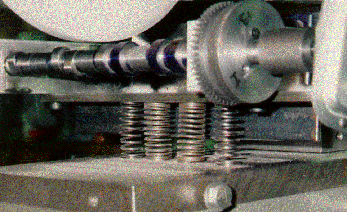
When all the holes were drilled, I removed the upper cover plate, and put the lower part on the mill. With a ball end mill I went all around the head, removing all the material I could between the major features. This left water passages above each combustion chamber and between all the valves. I drilled a series of holes between cylinders to allow water to flow thru to the block.
The photos shows the head iwth the cover plate removed. also in this photo are the pistons, rods, and rings.
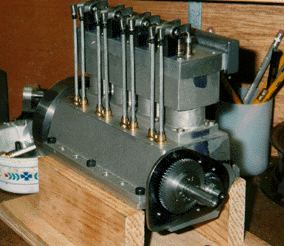
This final photo shows the almost assembled engine.